Saturday, 18 February 2012

Equipment Lists

These are my equipment lists that I have made for each scene, showing what I need to bring with me to each location to help create a professional, high quality film:

Scene 1 (part 1)

Canon 60D
Tripod on wheels
TASCAM BB-800
Rode NTG-2 Shotgun Microphone
XLR to XLR cable
1gb SD card
32gb SD card
Boom pole

Scene 1 (part 2)

Canon 60D
Canon 600D
2x tripods
TASCAM BB-800
Rode NTG-2 Shotgun Microphone
XLR to XLR cable
1gb SD card
16gb SD card
32gb SD card
Boom pole

Scene 2

Canon 60D
Manfrotto Modosteady
Opteka Video Stabilizer
Tripod
TASCAM BB-800
Rode NTG-2 Shotgun Microphone
XLR to XLR cable
1gb SD card
32gb SD card
Boom pole

Scene 3

Canon 60D
Canon 600D
Canon 5D mk II
Tripod on wheels
2x other tripods
TASCAM BB-800
Rode NTG-2 Shotgun Microphone
XLR to XLR cable
1gb SD card
16gb SD card
32gb SD card
8gb Compact flash card
Boom pole

Scene 4

Canon 60D
Canon 600D
2x tripods
TASCAM BB-800
Rode NTG-2 Shotgun Microphone
XLR to XLR cable
1gb SD card
16gb SD card
32gb SD card
Boom pole

Lots of this equipment is owned by myself, but I will also borrow various equipment from the media  and photography departments in school. 


Gauntlett goes to say that new media (and new media technologies) erodes the boundary between producer and audience to the extent that it makes little sense to talk about media audiences at all anymore: “Conventional research methods are replaced—or at least supplemented by new methods which recognise and make use of people's own creativity, and brush aside the outmoded notions of 'receiver' audiences and elite 'producers' (Gauntlett, 2007) This consequently erodes the boundary between the producer and the consumer, which is relevant through all my technology that I am using to shoot my film that wouldn't have been remotely available two years ago. I am lucky to be able to get my hands on this equipment, as some of it is rather expensive, but in relation to a fully budgeted feature film, the price of this equipment would be very minimal.

Filming Dates

Now that I know all of my actors are onboard, I need to sort out when I can get them at different locations on different days to complete my filming. Unlike a budgeted film, my actors aren’t actually getting paid money to star in my film, so I am worried that there might be a lack of incentive to work or make time to come and film with me. I will have to see how this plans out. But for now I have drawn up a list of dates for filming each scene in each location:

Scene 1 part 1
27th February
Hospital/Hair and Beauty/Woods Browning

Scene 1 part 2 and scene 4
29th February
Industrial Unit/Woods Browning

Scene 2
20th February
Respryn Woods

Scene 3
1st March
Hospital/Hair and Beauty/Woods Browning

Wednesday, 15 February 2012

Prop list


As a main part of mise en scene, props are a key aspect to consider when making a film. For instance, a period drama would need to have archaic items to create verisimilitude. But apart from creating realism and believability, props will also help support your narrative, for instance a dead rabbit is essential for my woods scene. Although I want to keep my props and scenery relatively low key, I want to create realism without having to try and create a particular time period. The following lists contain what props I will need for each scene:

Scene 1 part 1 (Hospital)

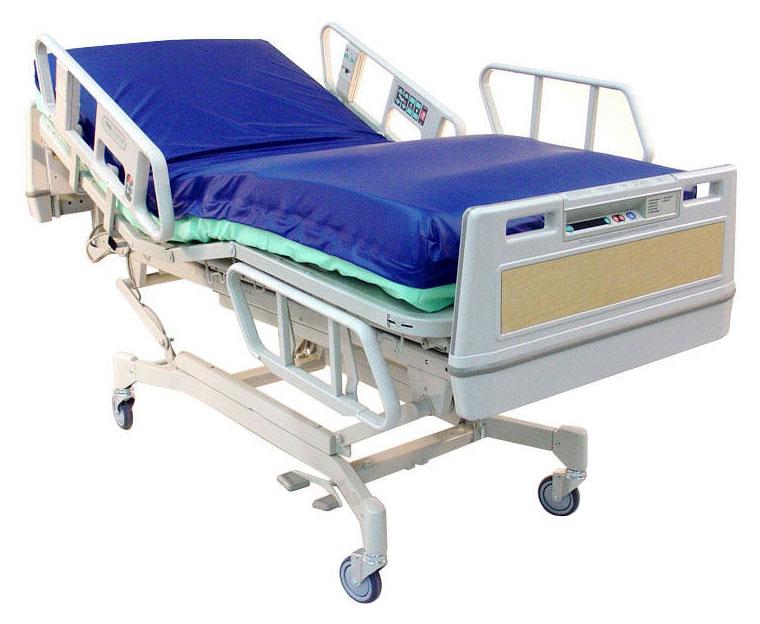
Hospital bed
Bedsheets
Lamp
Medical equipment
Wire chair

Scene 1 part 2 (Empty space)

Fold out camp bed
Bedheads
Pillow

Scene 2 (Woods)

Fake blood
Dead rabbit
Stones

Scene 3 (Hospital)

Hospital bed
Bedsheets
Lamp
Medical equipment
Wire chair

Scene 4 (Empty space)

Fold out camp bed
Bedheads
Pillow

Sunday, 12 February 2012

How I made my production company logo


This is a brief video consisting of screenshots which show how I created my production company logo in Adobe After Effects CS3.

Saturday, 11 February 2012

Distribution

When researching into film distribution, I stumbled upon an article written by David Sim from the BFI, which briefly explains some techniques of film distribution and briefly explores vertical integration. Sim goes to explain:

“Distribution is about releasing and sustaining films in the market place. In the practice of Hollywood and other forms of industrial cinema, the phases of production, distribution and exhibition operate most effectively when 'vertically integrated', where the three stages are seen as part of the same larger process, under the control of one company. In the UK, distribution is very much focused on marketing and sustaining a global product in local markets.

In the independent film sector, vertical integration does not operate so commonly. Producers tend not to have long-term economic links with distributors, who likewise have no formal connections with exhibitors. Here, as the pig-in-the-middle, distribution is necessarily a collaborative process, requiring the materials and rights of the producer and the cooperation of the exhibitor to promote and show the film in the best way possible. In this sector, distribution can be divided into three stages - licensing, marketing and logistics.”

This is an interesting article, and it links to my production and leads me to the question ‘How will I distribute my film?’ A short film like mine would be released through the BBC with their short film scheme, or Film4 who are the same. Both of these companies independently fund British films, shorts and features, with both being vertically integrated. Film4 would have been the company that I would have tried to get funding from, so I feel that they would be the company to distribute them too, especially as it is part of their vertical integration system. As an independent filmmaker I will also upload my film to websites such as Vimeo and Youtube so that a community of other filmmakers and the public could watch my product and I wouldn’t be paying a fee, I wouldn’t be receiving money for my film too though, but because I didn’t actually pay much money for it anyway this doesn’t matter.

Friday, 10 February 2012

Colour grading research

Colour grading is something that is used in almost every piece of professional digital video and film work. Colour grading can take the form of simple colour correction such as correcting the overall tone, or can be used to give a particular look, for instance making a scene look warm or cold.

Wikipedia defines colour grading as

“Color grading is the process of altering and enhancing the color of a motion picture or television image, either electronically, photo-chemically or digitally”. 

These days almost all colour grading is done digitally using various programs on different computers. Colour grading can consist of one or all of the following: changing brightness; changing contrast; adjusting white point; adding or removing red, green and blue; or applying filters.
Colour grading in it’s most basic form is usually used to either correct shots, like matching one shot with the next one, but can also be used to give a piece a look, or, for example, to make the sky more blue or someones skin look more flesh coloured.
Most video editing software contains some form of tool that’ll help the user to program colour correction and grading.These are some of the most common ones:

Final Cut Pro 

Final cut pro contains some good colour correction tools; not the most extensive or the best sometimes, but it’ll certainly do the job alot of the time! 

Color 

If your serious about colour correction and intend to do alot of it, Color is part of Final Cut Studio and is very good at colour grading providing lots of tools for correcting problems or giving a scene a look. It can also send sequences between its Final Cut Studio brother ‘Final Cut Pro’.

After Effects

After Effects is another program that has some great inbuilt colour grading tools, there are also a number of plug-ins available to extend it’s capabilities such as Red Giant’s Colourista II, this plug-in is also available for Final Cut too.
Premiere Pro

Premiere pro has a similar toolset for colour grading to Final Cut, not the best but certainly more than capable for most jobs.

Avid 

Avid is another video editing programme that can be used to colour grade, with a very robust set of tools. 


In terms of my film, I intend to use Final Cut Pro and Final Cut Studio’s Color to really add a certain feel to my film. The good thing about both of these products being Final Cut is that they are integrated with each other, so a sequence I create in Final Cut can be export to Color in a few clicks. If I need to learn more about how to actually colour grade, then I will look on the Vimeo Video School to look at some tutorials, but for now I know what to do.


Thursday, 9 February 2012

Editing research


When researching into editing techniques that I could use on my film I came across an interesting article written by Oliver Peters, an independent film editor and colourist, who explains his top twelve tips for film editing. This article is huge and really well written, so I shall post a link to it below, whilst quote a few tips that I feel that I will use the most.


“Moving camera shots – Moving the camera around is a staple of action sequences. This might be a camera on a dolly, crane, Steadicam or just handheld. In an action scene, this is designed to create a level of tension. When I cut these shots together, I prefer to cut on movement, so that the camera is in constant motion from one shot to the next. Many directors and DP will disagree, preferring instead to start and stop each camera move before making the cut. Both approaches work under the right situations, but my tendency is to cut tighter and not let the audience’s eye rest on the set or a shot or a scene for too long, unless there is a reason to do so.”

This technique is something that I have decided to storyboard into my storyboard mainly for the woods scene when the action is mainly following the child playing in the woods and discovering the dead rabbit. From this, I have also decided to use short and sharp cuts on the childs hands and expression in the lead up to discovering the rabbit, with eventually a long slow zoom into the dead animal.

“Pull the air out of actors’ performances – Going back to Item 1 – I like to cut tight. Recognize that many actors will overact. They will milk a scene for more than is appropriate. They will accentuate pauses, add more stumbles and stammers (where scripted) and give lengthy glances. Sometimes this works, but your job as the editor is to dial these back as you cut. Take these pauses out by cutting away and then back. Cut out redundant actions and line deliveries. Make it real, so it doesn’t feel like ACTING.”

This is undoubtedly something that I will have to do as an editor for this film, as when I first auditioned the cast for my film I could evidently tell that they over acted. I knew this would be something I would get with any actor, as the screenplay is very dramatic, even myself as an actor would struggle to give a convincing screen performance.